
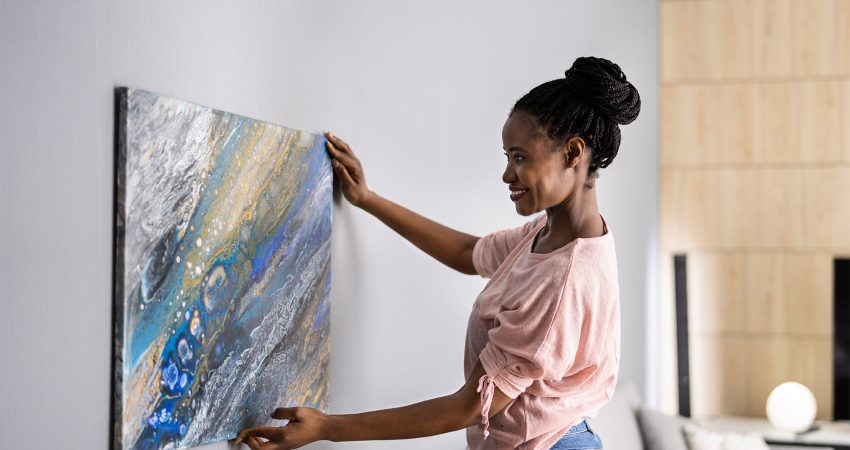
We’ve all been there. You’re excited to hang that new piece of art or those cherished family photos, but the process of actually getting it on the wall can feel like a DIY nightmare. Crooked frames, misplaced nails, and unsightly wall damage are all common pitfalls. But fear not! With a little knowledge and the right tools, you can confidently tackle any hanging project and transform your blank walls into captivating displays.
Know Your Walls (and What’s Inside Them):
Before you even pick up a hammer, it’s crucial to understand the type of wall you’re working with. Is it drywall, plaster, or concrete? Each material has different properties that affect how you should approach hanging your décor.
- Drywall: The most common wall type in modern homes, drywall is relatively easy to work with, but it’s also prone to damage if you’re not careful.
- Plaster: Often found in older homes, plaster is harder and denser than drywall. While it offers a sturdy base for hanging, you’ll need specialized tools and techniques.
- Concrete: A challenging material for DIY hanging, concrete walls require specialized drills and anchors.
Weight Matters:
A lightweight picture might be perfectly happy with a simple nail, while a heavy mirror or shelf could require more robust support. Consider the weight of the item you’re hanging and choose the appropriate hardware accordingly.
Essential Tools for Hanging Success:
Having the right tools on hand can make all the difference in your hanging endeavors. Here’s a checklist of essentials:
- Measuring Tape: Accurate measurements are key to ensuring your décor hangs straight and in the desired location.
- Level: A level is your best friend for preventing crooked artwork and shelves. Invest in a good quality level, and double-check your work as you go.
- Hammer: Essential for driving nails and tapping in anchors.
- Screwdriver or Drill: Needed for installing screws and other hardware.
- Pencil: Lightly mark your desired hanging spot before hammering or drilling.
- Stud Finder: For heavier items, locate the studs in your wall for maximum support.
- Appropriate Hanging Hardware: This includes picture hooks, D-rings, sawtooth hangers, wire, anchors, and screws. Choose the hardware that’s best suited for your item and wall type.
Hanging Tips and Techniques:
- Measure Twice, Hang Once: This age-old adage is crucial for avoiding unnecessary holes and frustration. Carefully measure and mark your desired spot before you start hammering.
- Consider Wall Anchors: For drywall, especially with heavier items, wall anchors provide extra support and prevent damage. They expand within the wall to create a secure hold.
- Hanging Pictures with Wire: Ensure the wire is taut but not overly tight. The wire should form a slight triangle when the picture is hanging.
- Creating Gallery Walls: Plan your layout on the floor first, using painter’s tape to visualize the arrangement on the wall. This helps you achieve balance and spacing before you start hammering.
Creating a Picture-Perfect Layout:
Achieving a balanced and aesthetically pleasing arrangement of pictures on your wall requires some planning.
- Visualize the Arrangement: Before you start hammering, arrange your pictures on the floor or a table to experiment with different layouts. Consider the size and shape of each piece, as well as the overall flow and balance of the arrangement.
- Create a Focal Point: Choose a larger or more visually striking piece to serve as the focal point of your arrangement. Place it in a prominent position and arrange the other pieces around it.
- Maintain Consistent Spacing: Use a consistent spacing between each picture to create a sense of harmony and order. A common guideline is to leave 2-3 inches between frames.
- Vary Heights and Orientations: Mix up the heights and orientations of your pictures to create visual interest. Don’t be afraid to combine horizontal and vertical pieces, and consider incorporating different frame styles and sizes.
- Use Painter’s Tape for Planning: Once you have a layout you like, use painter’s tape to mark the position of each frame on the wall. This allows you to visualize the arrangement and make adjustments before you start hanging.
Tackling Tricky Hanging Projects:
- Mirrors: Use heavy-duty hooks or wire, and consider using mirror adhesive for added security.
- Shelves: For floating shelves, ensure proper installation with the correct anchors and screws to support the weight of the shelf and its contents.
- Oddly Shaped Items: For items without traditional hanging hardware, consider adhesive strips, hooks, or specialized hangers designed for unusual shapes.
Just remember to have a plan, visualize your space, and make the most of that blank canvas awaiting your favorite family portraits. Happy Hanging!